Update: Article updated for iOS 16.
The screen video recording feature on iOS and iPadOS can be useful for creating tutorials, sharing a video game, or illustrating an operation. Its implementation is detailed below.
Step 1: Add the Video Recording Shortcut to Control Center
First of all, you have to go to the iOS settings to add the video screenshot shortcut to the control center.We have already spoken hereof the different possibilities available in the iOS settings to manage the control center.
By going toSettings > Control Center,we can therefore manage the commands accessible from the control center, particularly in the pageCustomize orders. In terms of shortcuts that can be added, let us cite for example the energy saving mode, or the stopwatch or the dictaphone, and, therefore, the command which will be useful for recording the screen,“Screen Recording”. To add the corresponding shortcut in the Control Center, simply:
- Search for the mention“Screen Recording”in the list
- Add it to the top named list“Orders included”by pressing the green +
That's it. If everything went as planned, the shortcut for the screen video capture function is now integrated into the Control Center.
© iPhon.fr
Step 2: Start Video Screenshot
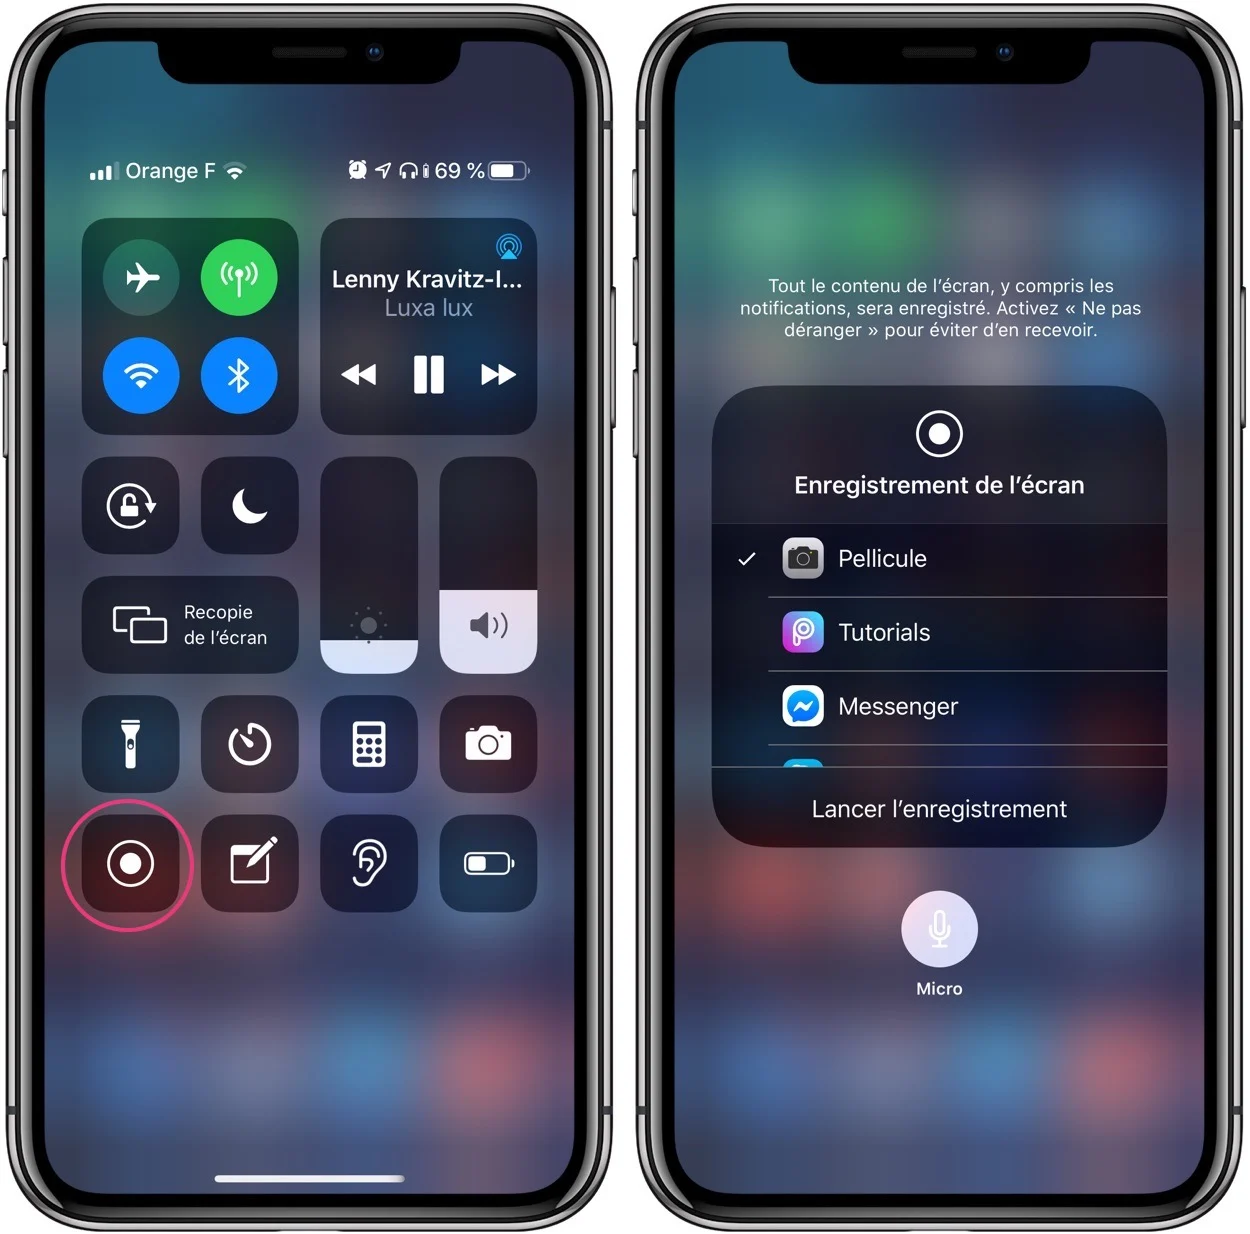
To start screen recording, you must first display the Control Center. The handling is different depending on your iPhone or iPad model and whether you benefit from Face ID or Touch ID.
- Device with Touch ID:swipe up from the bottom of the screen
- Device with Face ID:swipe from the upper right corner to the bottom or center of the screen
Then, asimple press of the capture button starts recording the video.
A few more settings
However, pressing Force Touch or 3D Touch on the same button provides access to a few additional options:
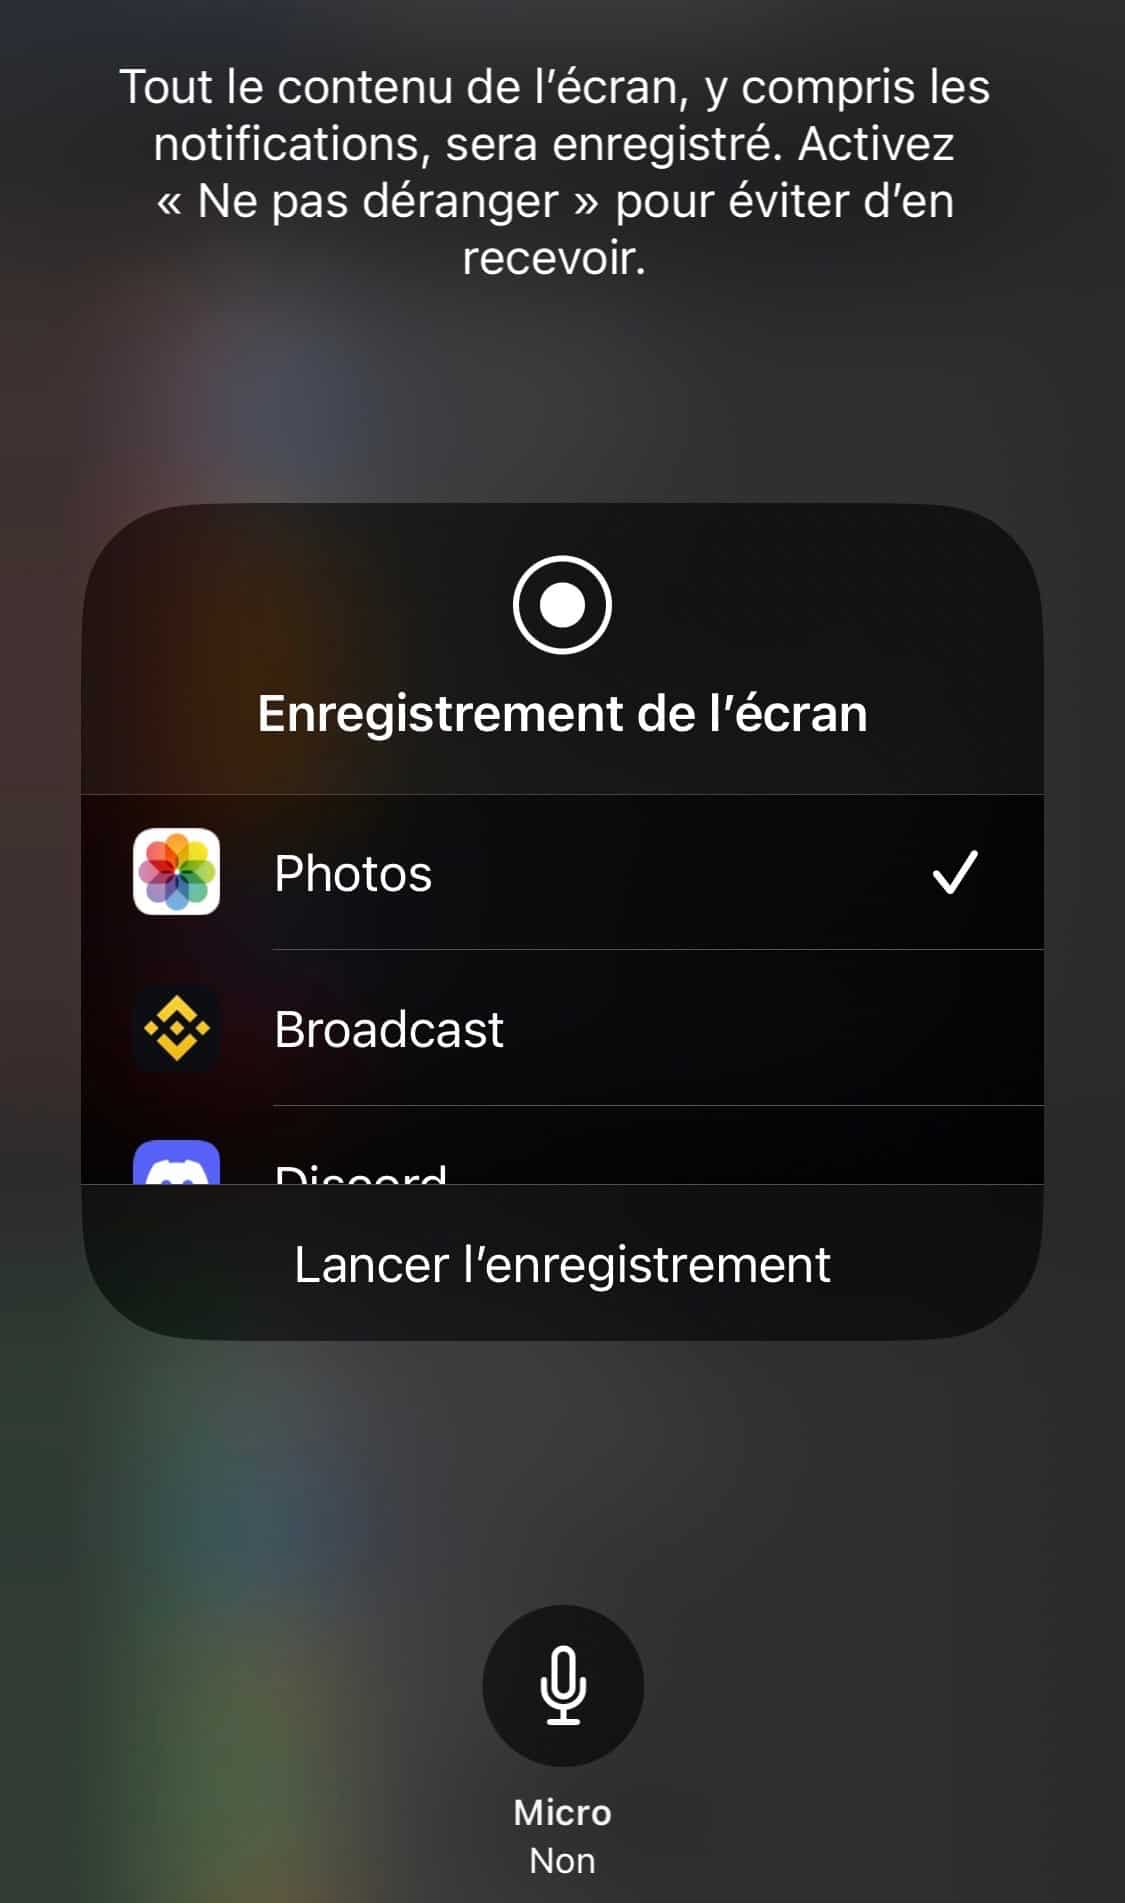
- Under “Screen Recording”: you can choose the destination of the video resulting from the recording: “Photos” to find it in your camera roll or other applications like Twitch or Skype and Zoom which can directly receive and process the capture
- Microphone: you can also choose to include the sound of the microphone in the video capture or not, by pressing the “Microphone” icon
iOS screenshot by iPhon.fr
Once you are ready, you have to press “Start recording” (or simply press the button in the control center, without going through these advanced settings).
After 3 seconds, the button thenin red to warn that video capture is active. A red indicator remains visible at the top of the screen (on time for iPhones with Face ID) to inform you that the recording is still active in progress. Note that it is absent when recording the screen in landscape mode, which is practical for games in particular.
iOS screenshot by iPhon.fr
Step 3: Stop iPhone or iPad Video Recording
To stop recording, simply press the same button in the control center again. The video is saved to the camera roll or sent to the chosen app.
And there you have it!

i-nfo.fr - Official iPhon.fr app
By : Keleops AG
Editor-in-chief for iPhon.fr. Pierre is like Indiana Jones, looking for the lost iOS trick. Also a long-time Mac user, Apple devices hold no secrets for him. Contact: pierre[a]iphon.fr.